
The work of a pro in the photo editor begins with the work with layers. At first, it is not clear what it is and how to deal with it, but we hope that the information provided in our article will be enough for the user to at least minimally understand this issue. We will tell you about the nuances of how do layer masks work and suggest the best ways for using them.
The main hero of our article will be Photoshop. However, this application has great alternatives, such as Luminar Neo. It may not be the most famous and widespread, but it is one of the most convenient applications for working with layers in photography. The very handy photo processing app with artificial intelligence allows even the most inexperienced beginners to perform quite complex tasks. If you want to expand the capabilities of your photo editor with a convenient and effective layer masking plugin, don`t waste time.
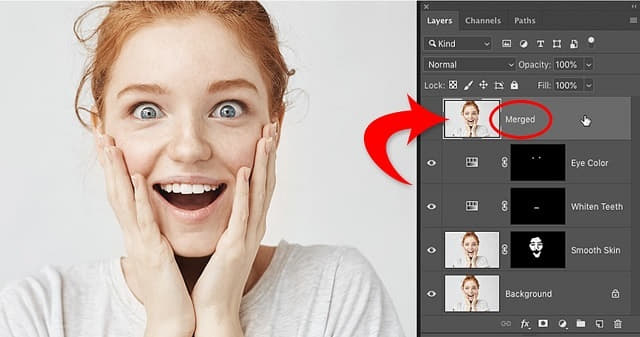
What Is a Layer?
The concept of a layer in Photoshop has exactly the same physical meaning as in life. It is a layer or masking layer that is an integral part of something whole. Layers are probably the most essential tools for working with images in Photoshop, and they allow you to divide the image into parts and edit each of them independently of the others. The layer can be compared to a transparent film superimposed on the image. And the transparency of the film is absolute: no number of layers will distort the pic on the lowest one.

How Do I Work With Layers in Photoshop?
Any layer can be made translucent. If there is an image on that layer, the bottom one will shine through. In the case of the adjustment layer, however, we simply reduce its effect on the image.
- Let’s find the Opacity slider and set it to 50%. The layer has become semi-transparent and our correction has a half-impact. This method is good when you don’t want to tinker with the complex adjustments and want to reduce their effect.
- Let’s adjust the mask of the adjustment layer. The problem is that you often want to affect not the whole picture, but only a part of it. This is what the mask is for. On the mask of the adjustment layer, you can erase the areas where the frame was oversaturated. But we will erase them not all the way, but exactly 50%.
- Let’s select the mask of the adjustment layer and activate the “Brush” tool. Most often photographers work with a very soft brush so that no sharp transitions are visible on the photo. By right-clicking on any fragment, adjust the “Brush” so that it is very large, but with zero Hardness. Now we have a solid layer mask, and we need the brush to sort of erase it. It’s easy to do: a white brush adds a mask, and a black one erases it.
- Let’s choose the black one. To make the brushwork on our mask halfway, we also set the opacity to about 50%: with one click, the brush creates semitransparency. But the more we click on one fragment with the left mouse button, the more transparent it will become.
- Let’s run the brush where we want to reduce the saturation. Note that the preview of the mask of the Vibrance layer has changed. Now it’s not a white rectangle, but an image of our mask. How to display the mask not only on the layer preview but also on the photo itself? Press the “\” key and the mask will be displayed in red. The redder, the more transparent it is. To remove it, press “\” again. The picture now looks more complete. It’s time to adjust the brightness of each part of the frame in more detail, with the help of masks. The layer mask can be inverted: make it so that, for now, our adjustment layer has no effect on anything.
- Let’s find the Masks item in the Properties panel (where the curve chart was). And click the Invert button. The mask will become black, i.e. completely transparent.
- Let’s darken the secondary objects and create a layer with curves that makes the frame darker. Again, invert the mask and draw the white brush over the objects you want to darken.
Now let’s try to finish the mask with another useful tool – the gradient. It is convenient for drawing masks. The thing is that by using brushes we can accidentally make a spot on the image, especially on the sky and other monotonous areas. Gradient, on the other hand, fills the mask linearly.
So, our brief guide is over. We hope that you have achieved the desired result and learned how to work with layers.