Samsung Galaxy Ace 2 Android 4.1.2 Jelly Bean firmware is now available for updating your device. This is the firmware that all the users were waiting for for a long time and in this guide, we will go through the procedure for updating the device.

This is update is based on I8160XXMC8 firmware to T-Mobile and as such this will bring in some extra language packs and carrier-specific apps on your phone visible after installation. Odin is the flashing tool used here.
Precautionary Measures
But before updating you should follow the below-mentioned precautions –
- Make sure that USB debugging is enabled on your phone. You can do it by going through Settings > Applications > Development > USB debugging if you are on Android 2.3. If you are on Android 4.0 you can do it by going through System Settings > Developer Options > USB debugging and ensuring that it’s ticked.
- Also, make sure that you have atleast 50 % battery life left on your device so as to ensure you don’t land into trouble of power crisis in between update procedures.
- Also, ensure that you have taken a complete backup of your device by any method that you usually followed until now.
- Also, ensure that you have installed the proper USB Drivers on your PC for a successful connection to the device.
- Before updating you should have rooted your Samsung Galaxy Ace 2 smartphone.
- This procedure is for Samsung Galaxy Ace 2 with model number I8160, no other phones should be flashed with this version.
Note: We have just provided the actual procedure and users must understand that this is third-party firmware software as such many options might not work on their phone. We would be held no responsible for anything that happens to your device.
Galaxy Ace 2 Update Procedure
Here is the step by step procedure to update your Galaxy Ace 2 I8160 with official firmware –
- Download the Android 4.1.2 I8160XXMC8 file for Galaxy Ace 2 onto your computer and extract the zip file.
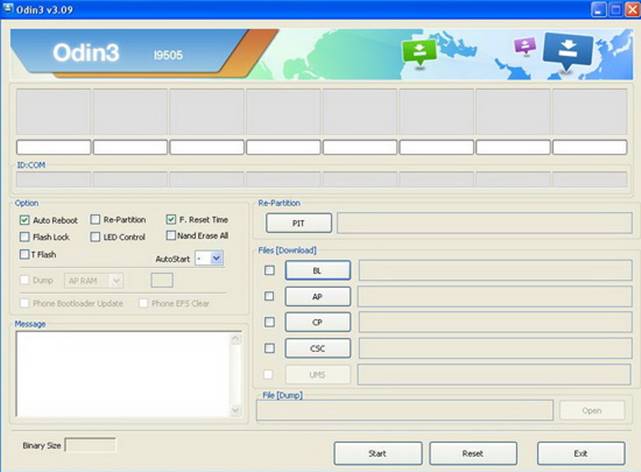
- Download ODIN v1.85 which is the flashing tool required for the Galaxy Ace 2 smartphone. Unzip and install it on your PC, keep it Open.
- Switch off your phone as you can enter it on Download Mode. How can you do that? You can do it by holding the Volume Down + Home button together along with the Power button for few seconds.
- Once you see the Green Robot with “downloading” on your screen.
- Now connect your phone using the USB cable to the PC. The successful connection is confirmed by pressing the ID:COM port as it will turn Yellow once USB drivers are loaded perfectly.
- Now you need to select the files accordingly –
- Click on ‘PDA’ and select the file with ‘CODE’ in its name.
- Click on ‘Phone’ and select the file with ‘MODEM’ in its name. Ignore this step if there is no such file.
- Click on ‘CSC’ and select the file with CSC’ in its name. Ignore this step if there is no such file.
- Click on ‘PIT’ and select the .pit file. Ignore this step if there is no such file.
- In ODIN also select Auto Reboot and F.Reset Time in the options.
- Now click on the Start button in the ODIN tool. Once the installation is completed your phone will be restarted automatically.
You can view phone specifications and compare them with other mobiles at Samsung’s new phones. Just select the device and then click on “Compare” to add another product/phone.
This post was last modified on December 21, 2023 7:35 PM