• Skip to primary navigation
  • Skip to main content
  • Skip to primary sidebar
  • PR & Contacts
  • Privacy Policy
  • About
  • Products

Technos Amigos

Mobile Phone News, Reviews & Tech How to Guide

  • Android
  • Apple
  • How to
  • Latest Tech News
  • Nokia
  • Phones
Home » iPhone 5C

iPhone 5C

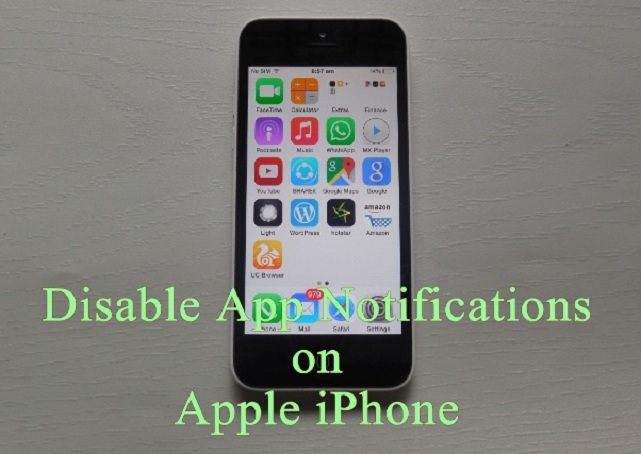
How to Disable App Notification on iPhone

A guide on How to Disable App Notification on iPhone.

Many a time during work I feel like certain app notifications are disturbing me. Social messaging apps like WhatsApp, Facebook Messenger, Twitter, and Google Hangout explode with a notification that includes sound, and appearance on the lockscreen and we have a habit to check them as they arrive on our smartphones. This is why most of the time I don’t turn ON Wi-Fi on my iPhone but that’s not the proper solution to the problem. The exact solution exists in disabling, mute or stop app notifications from a particular app on iPhone.

Disable App Notifications on Apple iPhone

Quite surprising thing is that you can easily turn or modify app notification that you see on your iPhone or any iOS device. Apple gives you 100% control over what type of notification that you want to see on your homescreen or lockscreen. To do that you just need to follow the process mentioned below –

  • First of all head to Settings on your iDevice.iPhone Setting
  • Now tap on Notifications.iPhone Settings Menu
  • Scroll down and look for the app which is disturbing you. Tap on it.iPhone Notification Settings
  • Now you have complete control on what do you want to see from that particular app. You can adjust how you want to see those notifications if at all you want to keep it. Well that’s the modification part.iPhone Notification Settings
  • You can disable notifications completely by tapping ‘Allow Notifications‘ option.iPhone Turn Off Notifications

That’s it. This guide works for iPhone 6S, 6S Plus, iPhone 6, 6 Plus, 5S, 5C, 5, 4S, iPhone SE and every other iDevice. And here is the video tutorial –

How to Fix iPhone Error 1669 on Apple Devices

iPhone Error 1669 often interrupts iPhone restoration using iTunes. Such unknown iPhone errors trouble Apple fans but on the other side there is nothing 100%. As such you need to fix those iPhone Errors when found.iPhone Error 1669

iPhone Error 1669

The iPhone “iPhone” could not be restored. An unknown error occurred (1669).

This article will help you fix iPhone Error 1669 error by sharing with you two effective methods of error handling. Before we move on to the ultimate procedure to solve this issue.

Here are some troubleshooting options that might be sufficient –

  • Keep your iTunes updated to the latest version.
  • Keep your operating system updated as well.
  • Reboot your computer.
  • Unplug any extra USB device. Keep only the iPhone plugged in while restoring it.

If the error occurs even when all this has been done, here are two methods of solving it –

Method 1

This method should work. Try this one out first. Here are the steps

  • Connect the iOS device to the computer.
  • Open iTunes.
  • Switch on DFU mode by holding the power button and home button together. Release the power button after 10 seconds and the home button after 5 more seconds. This sets the device into recovery mode.
  • You know you’ve done it right so far if your device flashes the instruction to restore it.
  • Connect the device to iTunes as the screen suggests.
  • Re-check whether you have backed up every important files and click the restore button in iTunes.
  • Wait for the restoration to complete and the device to turn on.
  • Click on the backup and everything will be restored.

Note: You can use the Command + Alt buttons in case of Mac and Control + Shift buttons in case of Windows to locate the IPSW content directly if it’s already there in your computer.

Method 2

Method 1 is supposed to work but if it doesn’t, here is a surer way to get the Error 1669 fixed

  • Temporarily store any local cache worth keeping from iTunes in a different location.
  • Delete iTunes and remove the cache from your PC.
  • Download and install the latest version of iTunes from Apple’s website.
  • Connect the iOS device to your PC.
  • Click on the ‘Check for updates’ option, if it says there are no available updates, your job is done.

Restore the device now and everything will be fine with no interruptions.

How to Toggle Geotagging on iOS – iPhone, iPad

Geotagging any photo is the process of tracking the latitude and longitude of the location of the photo that is mentioned in the details. This article is about toggling the Geotagging facility on or off because iOS 7.1 can track down locations automatically.

Toggle Geotagging on iOS 7.1

As the iPhone iOS 7.1 comes with smart Geotagging facilities that enable automatic location tracking of the photos you took with the camera on the phone and also sharing of all the information with other applications synced on the device. You can find a place tab under the Photos app where you tag your photos with the location. There you can see a small red-colored pin that serves the purpose of grouping all photos under the same location together so that you can see them all one after the other. This helps to view similar photographs, for example, vacation photographs in an organized manner.

Sometimes the location tracking is not on so you need to enable the Geotagging option. Sometimes you also need to turn the Geotaggingoff when you don’t want the whole world to know where you are. So you need to make sure that Geotagging is enabled when you want to share your location and disabled when you want your share of privacy and here is how you can do it for both, enabling and disabling it:

  • On your iPhone go to ‘Settings’. iPhone Settings
  • Go to ‘Privacy’.iPhone Privacy
  • Click on ‘Location Services’.
  • Toggle the camera in ‘On’ or ‘Off’ position for each app.

Key

Here are some keys to understand what stands for what:

  • Purple icon for apps that recently used your live location.
  • Gray icon for any app that used your location in the last 24 hours.
  • Outlined icon for any item using Geofence.

Compatibility: iPhone 5S, 5C, iPhone 5, iPad, iPad Mini, iPad Air, iPod Touch & other iOS 7.1 running devices.

How to Hide Default iPhone Apps on iOS 7.1

It is a well known fact that Apple never allows the potential consumers to delete or remove any of the stock apps in the operating system. People feel very awkward at such restrictions but here is good news for you! You can easily hide the stock apps from your device running on iOS platform due to one bug which still is present in iOS 7.1 and later versions.Hide Default iPhone Apps

Hide Default iPhone Apps

iOS 7 came with a bug because of which users can easily hide the stock apps on their devices however; it was fixed in the later versions of the OS by Apple. But, there is other trick which can be implemented to hide stock apps on Apple phone and that too; without doing any jailbreak task.

Follow the process mentioned below to hide default iPhone apps on iOS 7.1 which requires no jailbreak. Just go through these steps one by one and enjoy this very magical trick.

  • In the first step, you will have to see that dock of Home Screen on your device has maximum number of applications which is 6 for iPad and 4 for iPhone.
  • Create a folder and put all the official apps to be hidden in this folder.
  • This folder should be moved to the Home Screen, which is already full of apps.
  • Dragging one app on the other app will create a new folder. You will have to try for this step many times until your job is done. After creating this folder, put the previous created folder into this new one.
  • Remove all the apps that have been used to create the new folder.
  • In the last, the user should drag the folder along with the apps to be added, from the new folder which will make this folder to disappear from the Home Screen. Along with the folder, all official and default apps will also get disappeared or hidden.

Compatibility

This guide works for Apple iPhone 5S, 5C, 6, 5, 4S, 4, 3GS, iPad, iPad Mini, iPad Air

Note: – You should always remember that default apps will reappear on the screen after restarting your phone.

Download iPhone Data Recovery Software for Mac, Windows – PhoneRescue

You thought you would never be so careless as to delete gigabytes of files from your iPhone but you just did! Oh, you have cleaned up the call log and text messages too! Do not worry, now that you know it could happen to just anybody, be thankful that you can use PhoneRescue an iPhone data recovery software to retrieve all your valuable information stored in your phone. PhoneRescue is an application for data recovery on iOS devices. It works on Windows and Mac.iPhone Data Recovery

You can use this software to recover data as many times you want. This app is totally indispensable for the careless and even comes in handy for the careful people because nobody has control over accidents that are determined to happen.Phone Rescue software You may want to try other data recovery applications but here is why PhoneRescue is the best:

  • It is the only software that can recover 22 different types of media files on any iOS device. You will also get back all lost messages, image, video and audio files.
  • PhoneRescue also helps recover call history, iTunes backup files and photos from a damaged iOS device.
  • You can directly copy-paste all contents of the recovered data to the clipboard while exporting. This saves a lot of hard work and time. Convenience is the key element of the PhoneRescue software application.
  • The user-friendly user interface and step-by-step guide helps even a layman to recover all files with the most complicated procedures. With the screen-by-screen status display and button-by-button instructions, you would not need to ask anybody else to help you out.

Devices that support the PhoneRescue app are:

  • iPhone 3G and iPhone 3GS, iPhone 4 and iPhone 4S, iPhone 5, iPhone 5S and iPhone 5C
  • iPad, iPad 2, new iPad, iPad 4, iPad Air, iPad Mini
  • iPod touch and iPod touch 2, 3, 4 and 5

Basically all the current iOS devices support this app. The tool has returned gigabytes of apparently unretrievable data to their users. With this app handy, you do not have to worry about being the careless one with your phone or have a curious little baby around.

  • Page 1
  • Page 2
  • Go to Next Page »

Primary Sidebar

Something Interesting For You

iPhone Battery Draining Too Quickly Problem – One Step Fix Method

How to get your MetroPCS bill paid for Free

3 Tips for Managing Transformer Repairs Remotely

AT&T RollOver Data Rules, Limits & other FAQs


Copyright © Technos Amigos | Part of Yogesh Khetani blogging network