• Skip to primary navigation
  • Skip to main content
  • Skip to primary sidebar
  • PR & Contacts
  • Privacy Policy
  • About
  • Products

Technos Amigos

Mobile Phone News, Reviews & Tech How to Guide

  • Android
  • Apple
  • How to
  • Latest Tech News
  • Nokia
  • Phones
Home » Mac

Mac

How to Fix Some Common Mac Problems?

Even if you do purchase a brand new MacBook, there will be some problems, whether you like it or not. That is just the way technology like that is. 

But then again, certain issues being common is not necessarily the worst thing in the world. If nothing else, something that is encountered by many means that there are multiple methods to fix the problem.

This article will be a great reference for everyone who is still relatively new to using a Mac and will have to deal with some issues. You should be perfectly fine after reading it.

How to Fix Screen Flickering in Mac

Screen flickering is not the most common problem, but you have to admit that it can certainly make matters really bad if you have to deal with it.

It prevents you from using a computer because, well, you are unable to do anything. There are a couple of ways to fix screen flickering on mac, and you can find all of them here.

Fix Split View is not Working on Mac

Having a split view helps a lot, especially when you have to multitask and rely on using two applications at the same time. Not having to switch the tab between them all the time saves time.

Mac Split View Is Not Working

However, there might be some instances when it just does not work, even if you are doing everything right. Try going to the “Mission Control” panel and checking the box that is located near “Displays Have Separate Spaces”. Once you are done, log out from your current account and log back in. Everything should be working afterward. And if it does not, there is a much bigger problem with the computer itself.

How to Fix Startup Issues on Mac

You could be staring at a blank or gray screen instead of your desktop. If so, it means that the computer did not start properly.

The fix is pretty simple. You need to boot it in safe mode. This way, the OS will start with the bare necessities of drives, software, etc., and it will run a checkup on everything and will try to fix the problem.

How to Fix Unresponsive App Issues in Mac

Some apps tend to trip and hang, not allowing you to continue with the work. It can get pretty annoying, and if you notice a pattern of such behavior in certain apps, you have to look for a way to solve a problem quickly.

The method is pretty straightforward – force quit. Press the command + option + escape, select the app you want to kill, and press the “Force Quit” button. Also, if you are looking to shut down multiple apps, you can do so as well, by using a shift or control keys.

No Internet Connection

We rely on the internet for a lot of reasons. And when the connection goes down, it is quite common to start panicking. The same thing can happen on your MacBook. And it is not always the fault of the internet provider.

No Internet Connection

If the internet is suddenly not working, and simply rebooting the computer does not fix the issue, try deleting the current network connection you are using and reconnect to it again, as if it was something brand new.

Overheating Problems

Having a MacBook that is overheating does not bode well. The sound starts to get on your nerves, and you become anxious, thinking that it can turn into an even bigger problem.

The answer to this question should be quite clear. You need to start by clearing the dust and dirt. Then, take a closer look at the fan control software. Finally, consider getting a cooling pad as it really helps with this particular problem.

Apps You Download Are Not Working

The MacBook will prevent any apps you download from a source other than the official store from working. Nevertheless, this does not mean one ought to give up immediately. There is a way around this problem.

Go to “Security and Privacy”, click on “General”. Below, you should see an option that allows using apps downloaded from anywhere. Select that and save the changes. 

One thing to note, though, is that you are putting yourself at risk when downloading and using apps from the unofficial store. Be sure to keep this in mind.

Apps Start Running Automatically After Booting the Computer

Your startup process can be really slow depending on the number of apps that are set to launch as soon as you boot the computer.

Apps Start Running Automatically After Booting the Computer

To trim the number down, head over to “Users and Groups”. Click on your account and choose “Login Items”. Unmatch the boxes of the apps you want to disappear as startup items.

In a word, if you are still new to MacBook and do not know all the ins and outs, this article should be of great help and make things easier. After all, it takes time getting used to something new, and this one is no exception. It should become clear that the issues you encounter are not that problematic and can be solved.

Download Samsung KIES for Mac

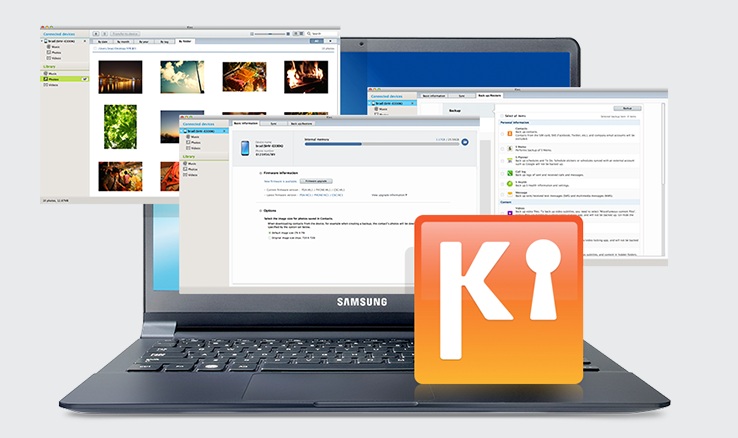
Samsung KIES for Mac, a software application freely used for Samsung devices like tablets and cell phones. KIES short for Key Initiative Easy System. Generally, the version of the KIES Software application is version 2.0 it is very common and outdated.Samsung KIES Air

Samsung KIES for Mac

Samsung KIES for Mac is used for organizing the data between the Mac OS and the Samsung mobiles. When this software is used as a backup then, the KIES for Mac is used for transferring the data, pictures, images, files, multimedia, video, documents, and other different products between the Mac and your Samsung mobile with the help of USB or any other wireless devices. The conventional way for sharing the data between Mac PC and devices is a USB cord. When sharing of data is high technology then we use LAN cable connection between the Mac and Samsung devices. KIES for Mac is also used for firmware updating.

KIES for Mac

There are two versions of the KIES software i.e. full version and the mini version. The mini version is generally used for Samsung devices to update their PC. On the other hand, the full version is also used for Samsung devices to update their PC and Macs. Both versions of this software are easily downloaded.

Requirements

You can only install KIES for Mac with the following requirements –

  • Mac OS X version 10.5 and higher
  • 1.8 GHz Intel or fast processor is required
  • Minimum of 512 MB RAM
  • At least 1000 MB of Free space is required

Compatibility

  • Samsung Galaxy S10, S9, S8, S7, S7 Edge, S6, S6 Edge
  • Samsung Galaxy Note 10, Note 20, Note 7, Galaxy Note 5, Note 4, Note 3, Note 2 & Galaxy Note
  • Samsung Galaxy A3, A5, A7 – all 2016 and 2017 models
  • Samsung Galaxy J1, J3, J5, J7 – all 2016 and 2017 models
  • Samsung Galaxy C3, C5, C7, C9, C9 Pro, C7 Pro, C5 Pro models

Download Samsung KIES for Windows

You can view phone specifications and compare them with other mobiles at Samsung’s new phones. Just select the device and then click on “Compare” to add another product/phone.

Download Teamviewer for Mac

TeamViewer is free software that comes with several features of remote controlling the other computers, having online meetings, desktop sharing, file transfer and web conference. All this is possible by having a working internet connection. Its version is available for all major operating systems like Microsoft Windows, Linux, Mac, Blackberry, Android Phone, Windows Phone, iOS and Windows RT.Teamviewer for Mac

TeamViewer Uses

Do you ever want to see what the issue is going on with another computer, or you wanted to share the same files with multiple users? Well, TeamViewer lets you to do the things in an easier way. You can easily gain remote control of someone computer or device, but you need is to have an internet connection and software on both the devices.

Follow the below steps to download TeamViewer for Mac and install on your machine:

  1. Download TeamViewer software from this link teamviewer.com.
  2. Locate the folder where you have saved the downloaded file.
  3. Double click on the ‘TeamViewer.dmg’ file and execute it.
  4. TeamViewer Screen opens.
  5. Click on ‘RunOnly’ option available at the lower left corner of the screen.
  6. Initial Setup Screen opens.
  7. Accept the software license by clicking on ‘I Accept’ button and proceed to the next screen.
  8. The software will install successfully on your machine.

Use TeamViewer on Mac

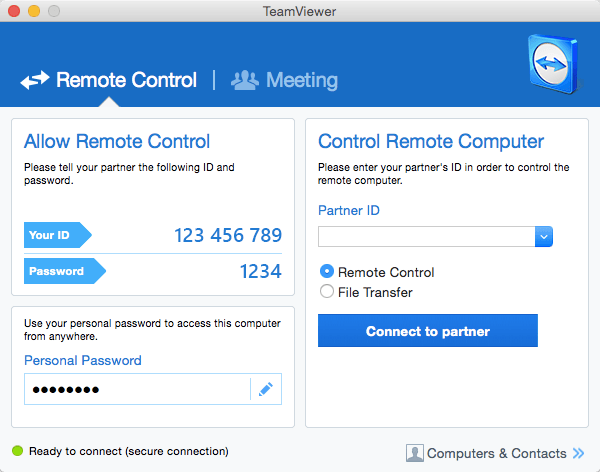
TeamViewer works by providing a unique ID and password to the user. Similarly, if you want to access someone’s computer, then you need their ID and password.

  1. Open TeamViewer Screen by double clicking on its icon.
  2. ‘Remote Control’ tab shows the users ID and Password. If someone wants to access your computer, then you need to share your login credentials given in this tab.
  3. ‘Control Remote Control’ section allows you to enter the other user ID to connect or send files.
  4. Enter the ID and click on ‘Connect to Partner’ button.
  5. Now enter the other user password on the next screen to gain access of their computer.

Download TeamViewer for Mac

How to Remove EXIF Info From Photos on Mac OS X

In this guide check out How to Remove EXIF Info From Photos on Mac OS X.

No one wants EXIF info or data of private images and photos to be displayed to the internet users and contacts because of a higher level of sensitivity and privacy. For this, you will have to remove embedded EXIF metadata of images before uploading them on the internet.

How to Remove EXIF Info From Photos on Mac

Of course, you have got plenty of strippers and EXIF removers for Windows but it would be really difficult for you to find the same thing for Mac. You may find online EXIF strippers but offline users will definitely miss this facility. Here, you will find 3 important apps which can be used to remove sensitive EXIF metadata information from images.

IMT Exif Remover

You can use this app to remove all kinds of EXIF tag information from bulk photos. Since it acts as a complete cleaner and eraser, everything will be removed at once.  IMT-Exif-Remover

ImageOptim

Valued Mac OS X users will really like this app because it is quite capable of compressing and optimizing any particular image. While following the process of compression, you can easily remove the EXIF information.ImageOptim

When you drag any specific photo into the window of ImageOptim, all EXIF metadata will be removed along with the image optimization process which is really amazing one. This software is completely free to be downloaded and used on Mac.

Image MetaData Stripper

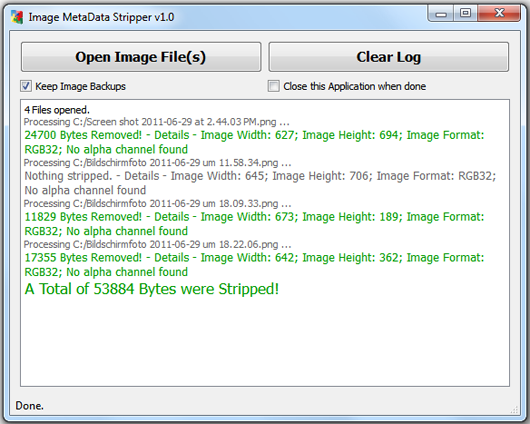
This app is a brilliant tool for cleaning images of EXIF data and information. While removing sensitive metadata and other useless information from the image, this tool will not compromise the quality. You can do this for a single or multiple photos at the same time and it will work for PNG and JPG image formats.


Image MetaData Stripper

So that’s how to remove EXIF Info From Photos on Mac OS X.

Change Country on iTunes Store, App Store, iBooks Store, Mac App Store

How to change country on iTunes Store, App Store, iBooks Store, & Mac App Store.

Like some of the apps, Apple also has its restrictions in some of the countries. There are countries whose people can avail all possible facilities and download all apps and there are countries whose people cannot. When third-party sources are applied even then it would work only within the country and not outside. Hence at times what people intend to do is change the country that they are registering with the App Store.iTunes App Store

Change Country on iTunes Store

Hence to avoid all these problems which might arise at any level one can save or change the name of the county they are registering from on iTunes or Apple App Store.

The process is simple but needs to be followed carefully in order to get what the users want.

For every time you download you must have a separate account. That’s one thing that has to be kept in mind.

Here are the steps you should follow to get to the country you want to register

  1. The option of ‘Setting’ has to be clicked on followed by iTunes and App Store
  2. Apple ID has to be tapped. Sign out after that.
  3. App Store has to be opened. Download whichever app you require or want.
  4. Pop-up will provide you the option of a new ID. Select that and proceed.
  5. Choose the country to be put in > Download whatever you need to > Accept the given Terms and Conditions.
  6. The email address that was made for this account has to be used, to a new one.
  7. The process will get completed, verify it.
  8. Done.

MAC

On your Mac device follow this process –

  1.  iTunes > click on iTunes Store.
  2. Scroll till you see that Flag icon on the screen, click.
  3. The next screen will give you the option of the countries via flags, select.
  4. Log in from the new account and use.

So, here is how to change Country on iTunes Store, App Store, iBooks Store, and Mac App Store.

  • Page 1
  • Page 2
  • Page 3
  • Page 4
  • Go to Next Page »

Primary Sidebar

Something Interesting For You

8 Top Technology Trends for 2025 and the Jobs They’ll Create

iPhone Battery Draining Too Quickly Problem – One Step Fix Method

How to get your MetroPCS bill paid for Free

3 Tips for Managing Transformer Repairs Remotely


Copyright © Technos Amigos | Part of Yogesh Khetani blogging network